
Editing Product Disclosures
Shopify recently added product disclosures to all product data.
You can use the default disclosure templates that Shopify provides on a product level, or use Ablestar Bulk Product Editor to edit those product disclosures in bulk.
Disclosures have to be present on a product level before you can bulk edit. Confirm your product data is synced before proceeding. From the app dashboard, navigate to Settings → Shopify data and click to 'Refresh metaobjects'.
Choose if you prefer the 'In-App Edit' or 'Spreadsheet' method:
1. In-App Edits
From the 'Configure modifications' view, select or search your disclosure from the 'Field to edit' dropdown.
If your disclosure entries are not visible in the 'Field to edit' dropdown yet, it might require a sync. From the app dashboard, navigate to Settings → Shopify data and click to 'Refresh metaobjects'.
There are several 'How to edit' options available to bulk edit your product disclosures:
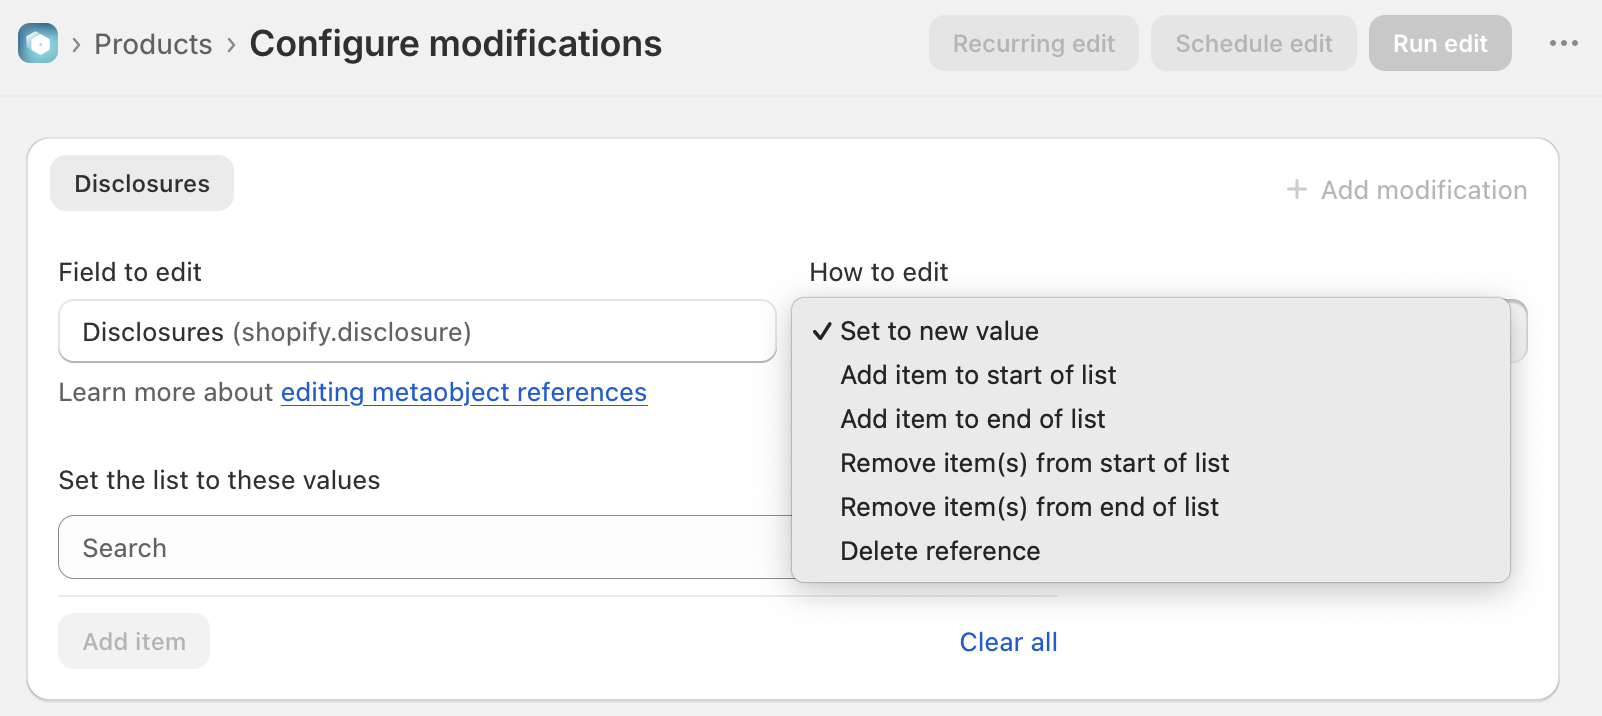
Clicking inside the 'Set the list to these values' field will pull up your existing disclosures or you can enter keywords to search.
Go more in depth with all the 'How to Edit' options here.
2. Spreadsheet Edits
Prep your spreadsheet to include the Shopify disclosure column similar to this layout, with the first-column identifier:
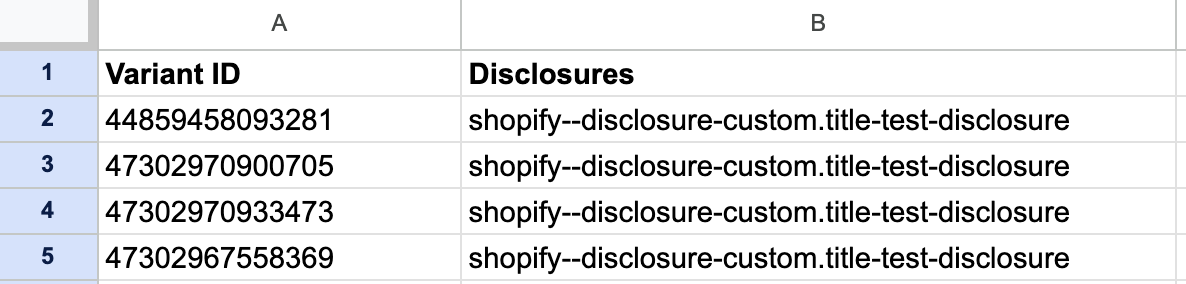
You can use either format as disclosure meta:
- Format that specifies 'type':
shopify--disclosure-custom.my-warning - Format without 'type':
us-ca-prop65-cancer-default
All new or modified data that is found on the spreadsheet will be processed and added to your store. The system will recognize when there is new or updated vendor data present on the spreadsheet.
✅ Tips and Troubleshooting
- Learn about various 'How to Edit' options for In-app edits
- Importing spreadsheets requires a first-column identifier
- Skip unchanged rows to increase the speed of uploads
(04.332)